Showing posts with label scrap creations. Show all posts

Monday, November 28, 2011

:LAYOUT: Fall Meets Winter

We haven't had our first snow yet this year.

We've been lucky, but it's bound to be on the way anytime now. A couple of years ago, we had our first snow in October...as evidenced by this layout.

(click for a larger view)

The green base of this two page spread pulls out the single green tree in the photo while the shimmering blue paper highlights the wintery theme. The brown, shimmery title stickers and gems further support the theme.

Journaling:
Would you believe that all these photos were taken on the same day? Leaves of green, gold, and red…and all of them blanketed with snow! Fall has always been my favorite season because of the cooler (but not cold) temperatures and the warm, rich colors. It’s not too often that you see the transition of seasons in a quite-so-obvious way, but I have to admit that the combinations of brilliant white snow softly swathing the leaves was quite beautiful.

October 12, 2009

Supplies:
Cardstock: Bazzill
Patterned Paper: My Mind’s Eye, Cosmo Cricket
Letter Stickers: Making Memories
Gems: ZVA
Ink: Colorbox
Corner Rounder: Marvy
Scallop Trimmer: Fiskars
Font: American Typewriter
:LAYOUT: Fall Meets WinterSocialTwist Tell-a-Friend

Friday, November 4, 2011

:LAYOUT: One Pretty Little Indian

Did you all have a good time on Halloween this year? I hope so...

It always seems a little 'off' to me when Halloween falls on a weekday, but not much I can do about that.

Kaitlin was a 50's Car Hop and hopefully I'll have the pictures ready to share with you soon.

Kaitlin got gobs of candy...98% of which she'll never eat, but that's not the point for her. I think she actually loves collecting it more than eating it.

It works out though because I always need candy to fill the dish on my desk at work...and I seem to have plenty of visitors that don't mind eating it up for me.

Here's a layout from Halloween last year...Kaitlin made one CUTE little Indian.

(click for a larger view)

Journaling:
It took us some discussion to agree
on a Halloween costume this year.
There are just so many choices -
ghosts, mermaids, cowgirls and more.
From the beginning,
I was wishing for a little Indian this year
and once I found this costume,
I won out…and ended up with one pretty little Indian.

Supplies:
Kraft: unknown
Patterned Paper: My Mind’s Eye
Letter Stickers: Fancy Pants, October Afternoon
Rub ons: Basic Grey, Hambly
Ribbon/cord: Rusty Pickle
Gems: Paper Studio
Ink: Colorbox
Oval Punch, Corner Rounder: Marvy
Font: CK Constitution
Pen: Zig
:LAYOUT: One Pretty Little IndianSocialTwist Tell-a-Friend

Monday, October 10, 2011

:LAYOUT: There's a new sheriff in town

One of the best parts of the pumpkin patch that we visited last year was this little sheriff's office...Kaitlin and her dad took their turns behind bars.

THREE THINGS TO TRY:
#1 - Use browns and distressed designs to accentuate a rustic theme.

#2 - Overlap an accent photo over an area of white space in another, larger photo. Mat in another color to help it stand out.

#3 - Attach twine (or other trim) with staples.

(click for a larger view)

Journaling:
One of the highlights that we found during our trip to Poppy’s was this little mock Sheriff’s Office. Both Justin and Kaitlin took their turn behind bars, but I think Justin looks a lot more natural in the role!
10-09-2010

Supplies:
Cardstock: Bazzill, American Crafts
Patterned Paper: My Mind’s Eye
Letter Stickers: Fancy Pants, Making Memories
Brads: Bazzill
Ink: Colorbox
Staples: office supply
Cord: Unknown
Font: Garamond
:LAYOUT: There's a new sheriff in townSocialTwist Tell-a-Friend

Tuesday, September 27, 2011

:LAYOUT: Poppy's

It'll be time to visit the pumpkin patch again soon...can't wait!!

Here's a layout from our pumpkin patch adventure last year...

(click for a larger view)

Journaling:
A couple years ago, I had heard about Poppy’s Pumpkin Patch outside Norfolk, NE from a friend of mine who had taken her children there and said it was great fun. So, I thought we’d give it a go this year and even got Justin to come along.

One of the things that Kaitlin was really excited about was the zip line. She couldn’t wait to ride it!

However, we arrived to find out that you had to be 50” to go on it and by their measurement, she came up about a 1/2 inch short. She was quite disappointed.

Unfortunately, that kind of set the tone for the rest of the day, but we tried our best to have fun.

There were some play areas such as a large plastic slide, a tricycle race track and more, but to be honest, most of them were kind of a disappointment. Out of five or six tricycles, only one actually worked! Also, there was a mini-version of the zip line for the kids, but it was just a bit too ‘mini’ for Kaitlin’s taste.

Of course, Kaitlin loved checking out the animals...except for when a goat butted its horn into her arm. They had llamas, horses, pigs, geese, goats and bunnies as well and Kaitlin always has a soft spot for animals.
Just the same, next year I think we’ll stick with picking our pumpkins at Garrity’s. Sometimes local is best.

Supplies:
Cardstock: Bazzill
Patterned Paper: My Mind’s Eye, Basic Grey
Chipboard Alpha: My Mind’s Eye
Wood Sign: Karen Foster
Flowers: Prima
Ink: Colorbox
Corner Rounder: Marvey
Scallop Trimmer: Fiskars
Font: Garamond
:LAYOUT: Poppy'sSocialTwist Tell-a-Friend

Monday, September 12, 2011

:LAYOUT: I Love math!

So far, Kaitlin is having a great time in 3rd grade. And, she still loves math. Math and art are currently her two favorite subjects.

The three chipboard elements create a visual triangle. The notebook paper edge on the journaling block are perfect for this school-themed page.


Journaling:
Grade One
I have to admit that I was a little surprised when you expressed that math was now your favorite subject a few weeks into first grade. You go girl!

Supplies:
Cardstock: Bazzill
Patterned Paper: Imaginisce
Chipboard: Imaginisce
Letter Stickers: October Afternoon, Making Memories
Ribbon: Offray
Ink: Colorbox
Pen: Zig
Corner Rounder: Marvy
Decorative Edge Punch: EK Success
Decorative Edge Punch: Fiskars
:LAYOUT: I Love math!SocialTwist Tell-a-Friend

Wednesday, September 7, 2011

:LAYOUT: Just the Way You Are

As soon as I heard the lyrics of this song, I knew that I wanted to use them on a layout featuring some favorite photos of Kaitlin.

She went through a period when she didn’t like her smile much thanks to a couple missing teeth, but I loved her smile just the same.

(click for a larger view)

Journaling:
When I see your face
There's not a thing that I would change
Cause you're amazing
Just the way you are
And when you smile,
The whole world stops and stares for awhile
Cause girl you're amazing
Just the way you are

(Lyrics from Just the Way You Are by Bruno Mars)

Supplies:
Patterned Paper: Pink Paislee
Letter Stickers: Pink Paislee
Rub ons: Bo Bunny
Flowers: Prima, craft store
Button: Bazzill
Brads: Making Memories
Corner Rounder: Marvy
Ink: Colorbox
Font: American Type
:LAYOUT: Just the Way You AreSocialTwist Tell-a-Friend

Wednesday, August 24, 2011

:LAYOUT: It's Gonna be a Banner Year

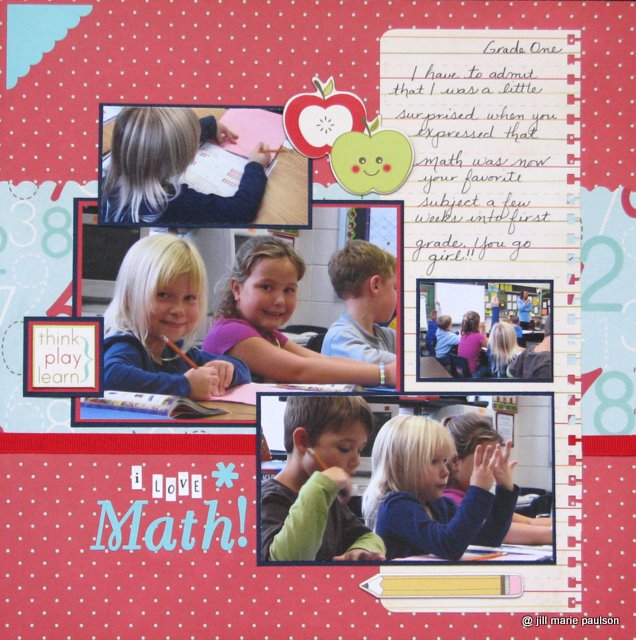
Second grade was a special grade for Kaitlin for several reasons and this layout will help us to remember why it meant so much to both of us.

THREE THINGS TO TRY:

#1 - Mimic a design element after a word in your title. For example, I have the work 'banner' in my title and my background paper features triangular banners.

#2 - Use a lined paper for your journaling on a school-themed layout.

#3 - Write your journaling first and take a phrase from it to use as your title.


Journaling:
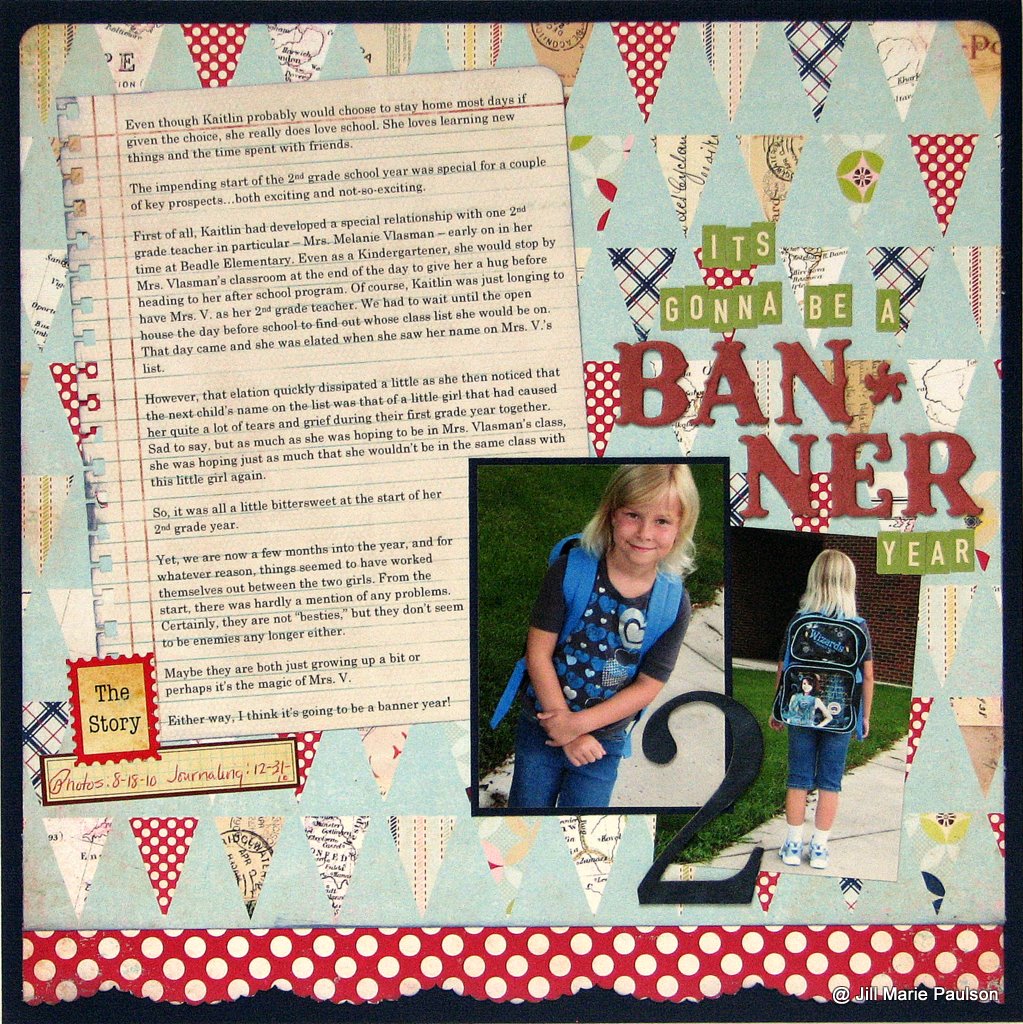
Even though Kaitlin probably would choose to stay home most days if given the choice, she really does love school. She loves learning new things and the time spent with friends.

The impending start of the 2nd grade school year was special for a couple of key prospects…both exciting and not-so-exciting.

First of all, Kaitlin had developed a special relationship with one 2nd grade teacher in particular - Mrs. Melanie Vlasman - early on in her time at Beadle Elementary. Even as a Kindergartener, she would stop by Mrs. Vlasman’s classroom at the end of the day to give her a hug before heading to her after school program.

Of course, Kaitlin was just longing to have Mrs. V. as her 2nd grade teacher. We had to wait until the open house the day before school to find out whose class list she would be on. That day came and she was elated when she saw her name on Mrs. V.’s list.

However, that elation quickly dissipated a little as she then noticed that the next child’s name on the list was that of a little girl that had caused her quite a lot of tears and grief during their first grade year together. Sad to say, but as much as she was hoping to be in Mrs. Vlasman’s class, she was hoping just as much that she wouldn’t be in the same class with this little girl again.

So, it was all a little bittersweet at the start of her 2nd grade year.

Yet, we are now a few months into the year, and for whatever reason, things seemed to have worked themselves out between the two girls. From the start, there was hardly a mention of any problems. Certainly, they are not “besties,” but they don’t seem to be enemies any longer either.

Maybe they are both just growing up a bit or perhaps it’s the magic of Mrs. V.

Either way, I think it’s going to be a banner year!

Supplies:
Cardstock: Bazzill
Patterned Paper: The Girl’s Paperie, Basic Grey
Stickers: The Girls Paperie
Chipboard: My Mind’s Eye, Basic Grey
Letter Stickers: October Afternoon
Ink: Colorbox
Corner Rounder: Marvy
Border Punch: EK Success, Martha Stewart
Font: Century School Book
Pen: Bic
:LAYOUT: It's Gonna be a Banner YearSocialTwist Tell-a-Friend

Thursday, August 4, 2011

:LAYOUT: Fluttering Butterflies

One more layout from our vacation last summer.

We had a wonderful time on our trip to the Black Hills the weekend before last and do hope to be sharing some pictures from that soon.

THREE THINGS TO TRY:
#1 - Divide diecut paper and use the ends on each side as a ‘frame’ for your layout.

#2 - Arranged all your photos along an imaginary center line.

#3 - Create a visual triangle with your title treatment and the two embellishments.

(Click for a larger view.)

Journaling:
The other major destination of our trip to see Katie and Eli during July 2010 was the Reiman Gardens on Sunday afternoon. It's located on campus of Iowa State University in Ames, IA where Eli teaches and is pursuing his PhD. Reiman Gardens is one of the largest public gardens in Iowa and is also home to a butterfly house. Butterflies can be hard to photograph! There were also a couple very big and beautiful blue butterflies that I was trying to capture, but they would just NOT land! Oh well...

Supplies:
Cardstock: unknown
Patterned Paper, Chipboard: Bo Bunny
Letter Stickers: Fancy Pants, Making Memories
Scallop Trimmer: Fiskars
Border Punch: EK Success
Ink: Colorbox
Font: Black Jack
:LAYOUT: Fluttering ButterfliesSocialTwist Tell-a-Friend

Thursday, July 28, 2011

:LAYOUT: Bieber Fever

Here's just a fun one to share with you today...

This layout was so much fun to make…I wanted to record this infatuation so that she could look back on it with a chuckle when she gets older.

THREE THINGS TO TRY:

#1 - Create a long strip of small, detail photos that span the width of your page.

#2 - Use a list as part of your journaling. Use brads as your 'bullets'.

#3 - Put a fun spin on a current infatuation or obsession and write the journaling as if it was really an illness or disease by listing the ‘symptoms’.

(click for a larger view)

Journaling:
Yup! She’s got it…and it’s a bad case, too! Like many young girls in the past year or so, Kaitlin has contracted Bieber fever. We’re not sure how she got it, but she’s got all the tell-tale signs:
  • images of his face plastered all over her room
  • a complete collection of his CDs and memorization of lyrics
  • a vast knowledge of Bieber trivia, including his favorite color (It’s purple!)
  • recent searches after she has used my laptop always includes ‘Justin Bieber’
  • her favorite shirt sports his name and image
We’re not sure how long this is going to last, but we’re hoping the fever will break soon. Of course, we’re praying that it’s not terminal. (I’ve heard he’s kind of a heart-breaker.) All prayers for her recovery would be greatly appreciated.

Supplies:
Cardstock: Core’dinations, unknown
Patterned Paper: My Mind’s Eye, Bo Bunny
Brads: We R Memory Keepers
Chipboard: American Crafts
Scallop Trimmer, Heart Punches, Fiskars
Corner Rounder: Marvy
Ink: Colorbox
Font: American Type
:LAYOUT: Bieber FeverSocialTwist Tell-a-Friend

Tuesday, July 19, 2011

:LAYOUT: The Gnome Project

Here's one more vacation layout from last year.

We are taking off on our Black Hills vacation in just a few days...I can't wait!!

THREE THINGS TO TRY:

#1 - Overlap a die-cut paper over the break in a two page spread to 'connect the canvas'.

#2 - Cut a lines of a large journaling block into strips to allow the background to show through. Make sure the lines of the journaling are different lengths for added interest.

#3 - Make photo corners to use in the top two corners with a pattern used elsewhere on your page.

(click to view larger)

Journaling:
During our visit to the Reiman Gardens in July 2010, they had a collection of the cutest little gnomes painted and decorated by 24 different Iowa organizations scattered throughout the gardens. It was fun to try to find them all hiding among the flowers! Not only that, but the collection also included the World's Largest Concrete Gnome at 15-feet-tall and nearly 3,500 pounds! It wasn’t hard to find that gnome…AMAZING! Garden gnome figurines date back to the 1800’s and are a good luck charm for gardeners and farmers.

Supplies:
Cardstock: American Crafts
Patterned Paper: Pink Paislee
Letter Stickers: Fancy Pants, October Afternoon
Flowers: Petaloo
Brads: Bazzill
Photo Corner Punch - EK Success
Border Punch: Martha Stewart
Ink: Colorbox
Font: Century Gothic
:LAYOUT: The Gnome ProjectSocialTwist Tell-a-Friend

Wednesday, July 13, 2011

:LAYOUT: Down the Garden Path

Justin, Kaitlin and I are looking forward to a little weekend vacation in just a little over a week.

We're going to the Black Hills. Justin and I have been there many times, but this will be Kaitlin's first time and I am so excited to share all the nature, history and attractions with her.

Here's a layout I completed after our weekend trip to visit Justin's sister and her husband in Boone, IA last summer. We visited the Reiman Gardens on the campus of the Iowa State University in Aimes. If you're ever in the area, I definitely recommend it...BEAUTIFUL!

THREE THINGS TO TRY:
#1 - For a layout in which you have LOTS of photos, create multiple 4x6 collages - some with 2 photos and some with four. Arrange on your layout in a grid format for an organized design that doesn't overwhelm the spread.

#2 - Create a visual triangle between your title and two other elements on the page (such as the rub on borders here) to move the viewers eye around the page.

#3 - Use mini-alphabets to supplement a long title and stretch the life of your more expensive chipboard letters.

(click for a larger view)

Supplies:
Cardstock: Bazzill, American Crafts
Patterned Paper: My Mind’s Eye
Letter Stickers: Making Memories, October Afternoon
Rub ons: Bo Bunny
Scallop Trimmer: Fiskars
Pen: Bix
:LAYOUT: Down the Garden PathSocialTwist Tell-a-Friend

Thursday, July 7, 2011

:LAYOUT: At the Pool!

THREE THINGS TO TRY:

1. Use a patterned paper that enhances the theme of your layout...such as a wave pattern for a pool or beach layout.

2. Mat your photos and journaling on a solid cardstock block and adhere in a central location on your page.

3. Embellish your title with rub ons and gems.


Journaling:
After an extremely busy spring for Kaitlin (and therefore, for mom, too) with school, two plays, dance and more, we both decided we wanted a low-key summer. So, that meant NO extra activities for Kaitlin and a few extra days off for mom. Since Kaitlin became such a fish this summer, we spent a lot of time at the pool with Kaitlin splashing away and me usually enjoying a good book or magazine on a lounge chair in the shade. Not a bad way to spend free time on a warm summer day!

Supplies:
Cardstock: Bazzill
Patterned Paper, Letter Stickers: American Crafts
Rub ons: Fancy Pants
Gems: ZVA
Ric Rac: Wrights
Font: CK Journaling
:LAYOUT: At the Pool!SocialTwist Tell-a-Friend

Friday, July 1, 2011

:LAYOUT: Big Bang

Here's one more layout to celebrate the 4th!!

THREE THINGS TO TRY:

1. Some layouts just don't need journaling. Create a layout where you let the photos speak for themselves.

2. Fit 12 photos on a layout with plenty of room left for eye-pleasing white space by printing all your photos in wallet size.

3. Add interest to the page (and create a connection across a two-page spread) by adding strips of several different papers with a creative edge treatment.

(click for a larger view)

Supplies:
Cardstock: Bazzill
Patterned Paper: Scenic Route, Rusty Pickle
Chipboard: American Crafts
Rub ons: Basic Grey
Scallop Trimmer: Fiskars
:LAYOUT: Big BangSocialTwist Tell-a-Friend

Thursday, June 23, 2011

:LAYOUT: A Wonderful Summertime Tradition

This past weekend was my hometown's annual celebration of our Czech heritage (Czech Days) and, of course, Kaitlin and I took part in the festivities on Thursday and Friday including a baseball game, fireworks, a parade, carnival rides, ethnic food and more.

A highlight this year was that the last play of the game was a home run and Kaitlin got the ball. She ran out onto the field with her uncle Lee to get the ball signed by the hitter and was SO excited. She even left her daddy a note on the bathroom cupboard to wake her up when he got home from work at 4 a.m. (he works nights) just so that she could tell him about it!

Here's a layout I created last year highlighting our favorite entries in the big parade on Friday.

I used a standard 4x6 photo as the focal photo and then created several 4x6 collage prints (with four photos each) to highlight our favorite entries in the parade. This is a great way to include lots of pics on one layout.

(click for a larger view)

Instead of a THREE THINGS TO TRY with this layout, I'd like to encourage a little discussion with an "I'M CURIOUS" instead.

I'M CURIOUS:
This year, I opted to NOT take my camera along as I have SO MANY pictures of Czech Days over the years. Do you ever purposely leave your camera at home? If so, when do you tend to make this decision and why? Do you ever regret it or feel guilty about not filling the role of family photographer?

Journaling:
Summertime just wouldn’t be complete without Czech Days for this family. June 2010

Supplies:
Cardstock: Prism
Patterned Paper, Stickers, Journaling Block: Echo Park
Pen: Bic
Circle Rounder: Marvy
Scallop Trimmer: Fiskars
:LAYOUT: A Wonderful Summertime TraditionSocialTwist Tell-a-Friend

Thursday, June 9, 2011

:LAYOUT: Celebrate

I can't quite believe it, but my little girl turns NINE today!! What can I say...she is growing up WAY TOO FAST for my taste!

I'm taking the day off work today to help her celebrate. I'm not sure exactly what we're going to do yet - picnic in the park...afternoon movie at the theater...perhaps - but that's have the fun of it, right? We'll just have to see where the day takes us...

We also have an annual little backyard barbecue get-together with family to celebrate and we are getting ready for that this weekend, so I thought I'd share a layout today that highlighted last year's party.

THREE THINGS TO TRY:

1. Create a long strip of photos in various widths (but the same height) that spans the width of a two page layout.

2. Use a circle punch to create a base for journaling and other embellishments on your page.

3. Don't by scared...handwrite your journaling.

(click for a larger view)

Journaling:
2010 ~ Kaitlin’s birthday is always a great excuse to celebrate with family. Kaitlin looks forward to the festivities each year - great food, fun and, of course, a few gifts!

Supplies:
Cardstock: Unknown
Patterned Paper: Echo Park, October Afternoon, Fancy Pants
Sticker: Echo Park
Rub ons: Fancy Pants
Chipboard: Basic Grey
Pen: Bic
Circle Punch: Marvy
Corner Rounder: Marvy
:LAYOUT: CelebrateSocialTwist Tell-a-Friend

Thursday, June 2, 2011

:LAYOUT: Indian Village

Since the weather looked to be uncertain this year, my family decided to forgo our annual picnic and just enjoyed lunch at Olive Garden (a family favorite). It ended up NOT raining, so we did still visit Falls Park in Sioux Falls...beautiful. Highly recommended if you've never been there.

Here's a layout from last year's Memorial Day activities when we visited the Prehistoric Indian Village in Mitchell, SD.

THREE THINGS TO TRY:

1. Use a standard 4x6 photo as the focal photo and then create several 4x6 collage prints (some with two photos and some with four) to highlight other aspects of the theme without overwhelming the layout.

2. Arrange your photos on a square mat and use blocks of patterned paper to fill in the gaps.

3. Use three elements that extend beyond the block to create a visual triangle.

(click for a larger view)

Journaling:
The 2nd stop on our Memorial Day trip was the Prehistoric Indian Village in Mitchell. 2010

Supplies:
Cardstock: Bazzill
Patterned Paper, Stickers, Journaling Spots: October Afternoon
Letter Stickers: Basic Grey
Pens: Bic
Ink: Colorbox
Edge Distressor: Heidi Swapp
Border Punch: EK Success
:LAYOUT: Indian VillageSocialTwist Tell-a-Friend

Tuesday, May 24, 2011

:LAYOUT: Feelin' Squirrely

We have baby squirrels again this spring and they provide LOTS of entertainment!

Here's a layout I created about our outdoor friends last year.

THREE THINGS TO TRY:

1. Use kraft paper as a background for a layout with a animal or nature theme.

2. Create custom embellishments by punching shaped from patterned paper.

3. Use a circle punch to make an 'opening' to house an embellishment for extra interest.


Journaling:
June 2010 ~ We had a mother squirrel and her four babies move into our tree this spring. Justin got some corn from dad and we’ve enjoyed watching them fatten up!

Supplies:
Kraft: Unknown
Patterned Paper: Scrap Within Reach
Chipboard: American Crafts
Ink: Colorbox
Pen: Zig
Circle Punches: Marvy
Scallop Trimmer: Fiskars
:LAYOUT: Feelin' SquirrelySocialTwist Tell-a-Friend

Tuesday, May 17, 2011

:LAYOUT: Beautiful Dancer

Kaitlin just had her dance recital's this past weekend. She performed with her dance team class during the Saturday afternoon performance and with her tap class during the Sunday afternoon performance.

I must admit...I LOVE watching her dance and honestly can't wait to watch her grow and learn in this area. Each year, I watch the Senior dancers perform their solos and dream about it being Kaitlin up there one day...although, I don't want it to come too fast...I can wait. :-)

Anyway, all this dancing prompted the layout I'm sharing with you today. This is from her ballet class in 2009-2010.

I have basically stopped submitting layouts recently (just too time consuming), but I was lucky enough to have this particular layout in the February 2011 issue of Scrapbook News & Review.

THREE THINGS TO TRY:
1. Use left-over chipboard sheets (often comes with paper orders and saves your pop dots for smaller items) to 'lift' large elements (as I did with my focal photo) off the page.

2. Embellish a rub on design with gems to give it some extra pizazz.

3. Create a leading line with a variety of elements on you layout to help guide the viewer's eye as I did here with the left edge of the patterned paper strips, title treatment, and gem/butterfly grouping starting at the bottom left and moving to the top right corners of my layout.


Supplies:
Cardstock: Bazzill
Patterned Paper, Rub Ons: Bo Bunny
Letter Stickers: Making Memories
Chipboard Letters: American Crafts
Gems: Doodlebug Designs
Butterflies: Jenni Bowlin
Scalloped Trimmer: Fiskars
Photo Corner Punch: EK Success
Ink: Colorbox
Pen: Zig
:LAYOUT: Beautiful DancerSocialTwist Tell-a-Friend

Tuesday, May 3, 2011

:LAYOUT: One Dancing Princess

Kaitlin's dance recital is coming up soon. This year, she took both tap and dance team class, so will actually be performing in two different weekend performances.

Here's a layout looking back at Kaitlin's very first dance recital for her first ballet class.

Isn't she cute!?

THREE THINGS TO TRY:
1. Convert photos that have clashing colors or lighting circumstances to black and white to minimize the contrast.
2. Use a patterned paper strip spanning a two-page spread to unify the pages in your design.
3. Include lots of photos economically by creating collages of 4 photos on one 4x6 print.

(Click for a larger view.)

Journaling:
Kaitlin’s 1st dance recital / 5-16-2009

Supplies:
Adhesive: Duck
Patterned Paper: Making Memories
Lace Paper (butterflies): KI Memories
Journaling Spot: Making Memories
Letter Stickers: Little Yellow Bicycle
Gems: ZVA
Ink: Colorbox
Scallop Trimmer: Fiskars
Photo Corner Punch: EK Success
Pen: Zig
:LAYOUT: One Dancing PrincessSocialTwist Tell-a-Friend

Thursday, April 28, 2011

:LAYOUT: One of my favorite things

I didn’t really have a photo to go along with this story, so I simply ordered a print of the DVD cover.

The floral paper and vintage-style brands work so well with the time frame of the musical and the colors are perfect as well.

THREE THINGS TO TRY:
1. Use a combination of a decorative rub on and two different styles of alphabet stickers to create your title treatment.
2. Type your journaling and insert a drop cap for a classic look.
3. Use decorative brads to break up blocks of journaling.


Journaling:
I can’t tell you exactly when I first saw the film The Sound of Music with Julie Andrews as Maria, but I can tell you that ever since I did, it’s been one of my favorite musicals of all time. There is just something about Maria and this classic and just makes me want to sing!

Around Christmas 2009, I saw the DVD on sale and thought it was about time that I shared this favorite with Kaitlin, then 7 years old.

So, on one of our days off, we snuggled up together and watched.

Like mother, like daughter…Kaitlin now loves The Sound of Music as well. We’ve watched it a few times together since them and it’s not uncommon to find her humming of singing one of the songs. “Sixteen Going on Seventeen” seems to be her favorite…which is appropriate as it seems as if she is seven going on sixteen a lot of the time!

Hopefully, there will be many other little favorites such as The Sound of Music that we can share and enjoy together as we go through life together.

Supplies:
Cardstock: Prism
Patterned Paper: Fancy Pants, Making Memories
Rub ons: Basic Grey
Letter Stickers: Making Memories, October Afternoon
Brads: Making Memories
Gems: Paper Studio
Butterfly Punch: EK Success
Corner Punch: Marvy
Ink: Colorbox
Fonts: Floral Dawn, Garamond
:LAYOUT: One of my favorite thingsSocialTwist Tell-a-Friend